The Cromford & High Peak Railway

A railway to connect two canals

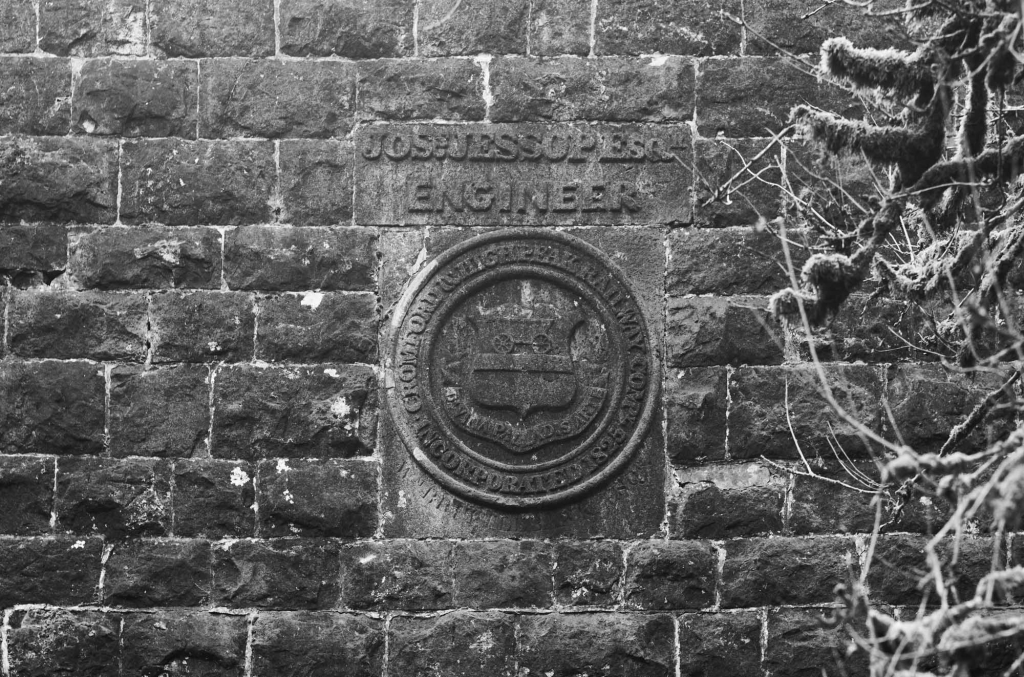
The Cromford Canal, giving access to the Trent, was built by William Jessop and opened in 1792. The Peak Forest Canal from Manchester to Bugsworth and Whaley Bridge, engineered by Benjamin Outram, was opened in 1800. There was a proposal for a canal joining the two canals along the line of the C&HPR which was abandoned because of the lack of water at the highest level. Each boat passing up or down the locks removes a lockful of water from the summit level, and there is no source of water on the limestone plateau. A feasible route was surveyed by John Rennie. The route was up the Derwent Valley to Hope, then to the head of Edale and a tunnel nearly three miles long to Chapel Milton, roughly along the line of the Cowburn Tunnel on the Hope Valley Line. The estimated cost, in 1810, was the enormous sum of £650,000. Needless to say, it was not built. In 1824 Josias Jessop was appointed to prepare a survey of a railway line from Whaley Bridge to Cromford. His estimated cost was a more reasonable £150,000, but his estimates of the potential revenue seem with hindsight to have been wildly optimistic.

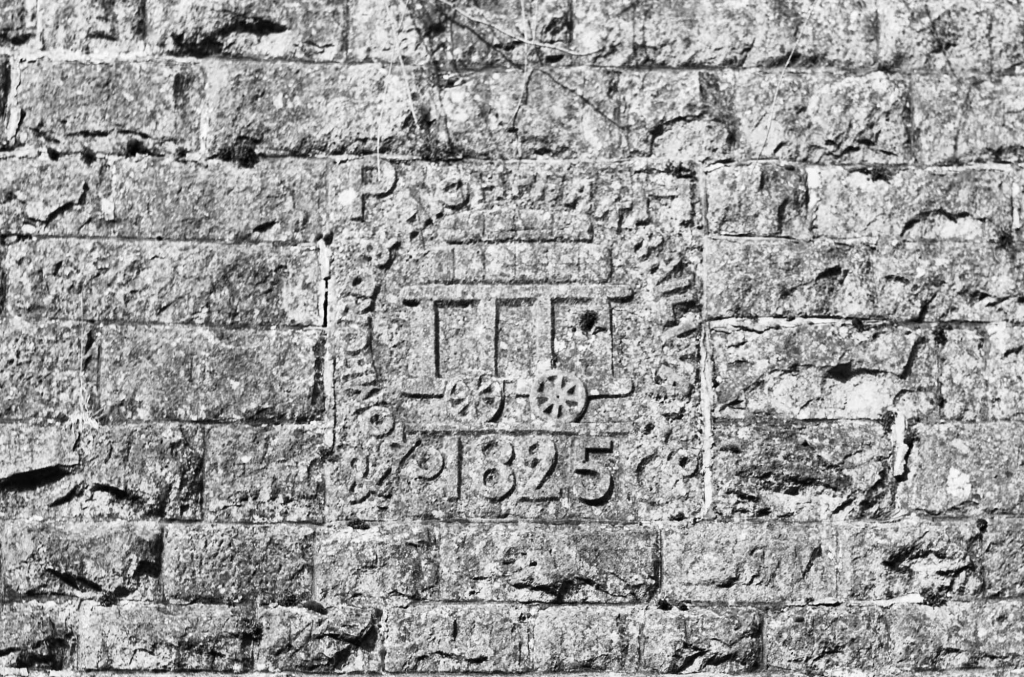
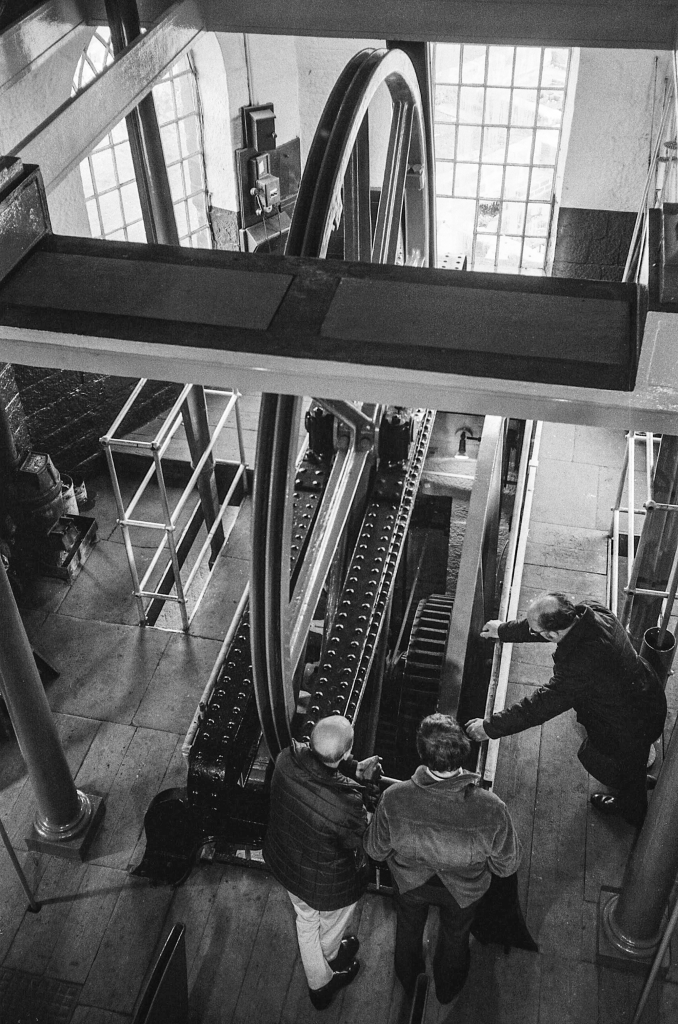
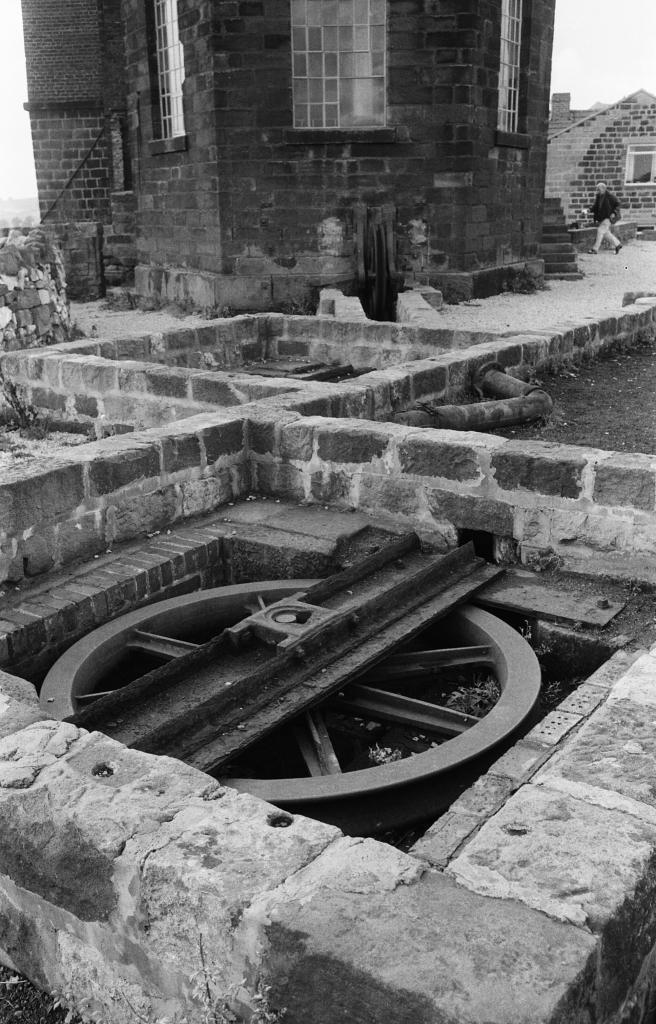
This is very early for a railway – the Stockton and Darlington opened in 1825, and the Liverpool & Manchester in 1830. It was initially believed that the friction between iron wheels and iron rails was too low for locomotives to do more than haul wagons along a level railroad. The earliest railways were therefore designed like canals, with flat sections joined together by inclines up which the wagons were hauled by a stationary steam engine and a rope or chain. It was in fact correct that the early locomotives could not haul wagons up an incline, but the reason was low power-to-weight ratio, not lack of friction. The very rapid development of steam locomotives soon removed this limitation. The incline out of Whaley Bridge, and the two steep inclines down to Cromford Wharf, continued using rope haulage until the line closed in 1967.

The Midland Railway’s line from Ashbourne to Buxton was opened in 1892, joining the C&HPR at Parsley Hay and partially or totally replacing the C&HPR north of Parsley Hay. The two railway lines are now popular trails through the Peak District from south of Dowlow quarry to Cromford and Ashbourne. North of Dowlow the original line can be followed in part. I will concentrate on this section, as books about the C&HPR tend to concentrate on what the line was like when working, not on what now remains. I will say a bit about interesting features along the High Peak Trail.

A 1:25,000 OS map is very useful for working out the original course of the railway, as most of the boundary walls are still in place, except in Brierlow and Hindlow Quarries and Dowlow Works, which are inaccessible anyway.

Whaley Bridge

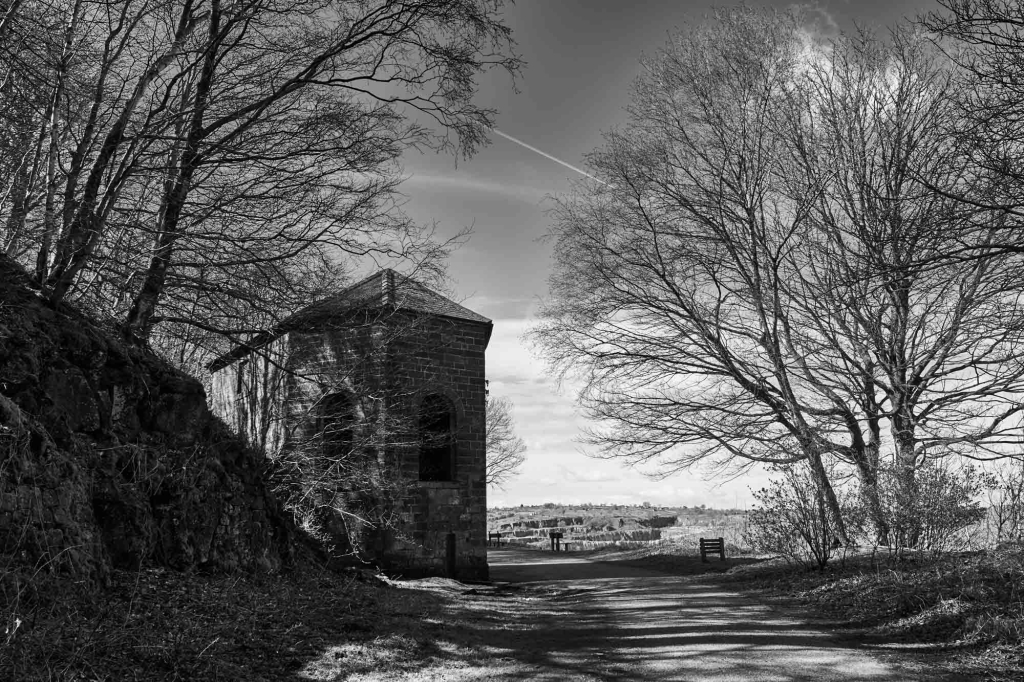
The original terminus of the Peak Forest Canal was Bugsworth Basin, where limestone from the Dove Holes quarries was converted to lime and loaded into barges. The arm to Whaley Bridge terminates in a small basin with a transhipment shed for transferring goods to the C&HPR. Most of the first couple of kilometers from the basin has been restored as a linear park, up the Whaley Bridge and Shallcross inclines.

The transhipment shed at Whaley Bridge.

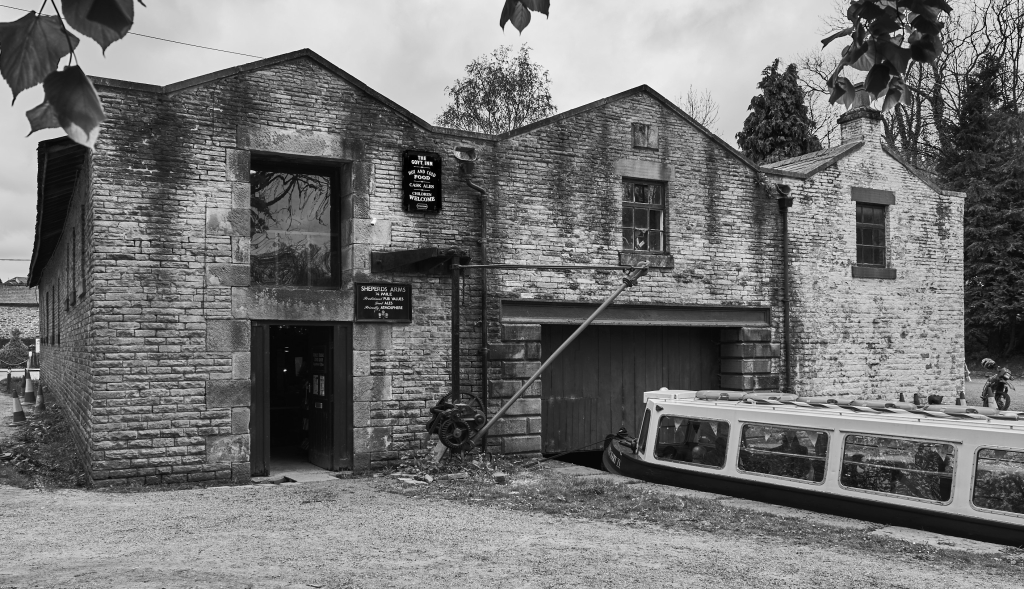
From the transhipment shed it is a a short walk to the bridge over the River Goyt and the foot of the Whaley Bridge incline.

The railway bridge over the River Goyt at the foot of the incline.

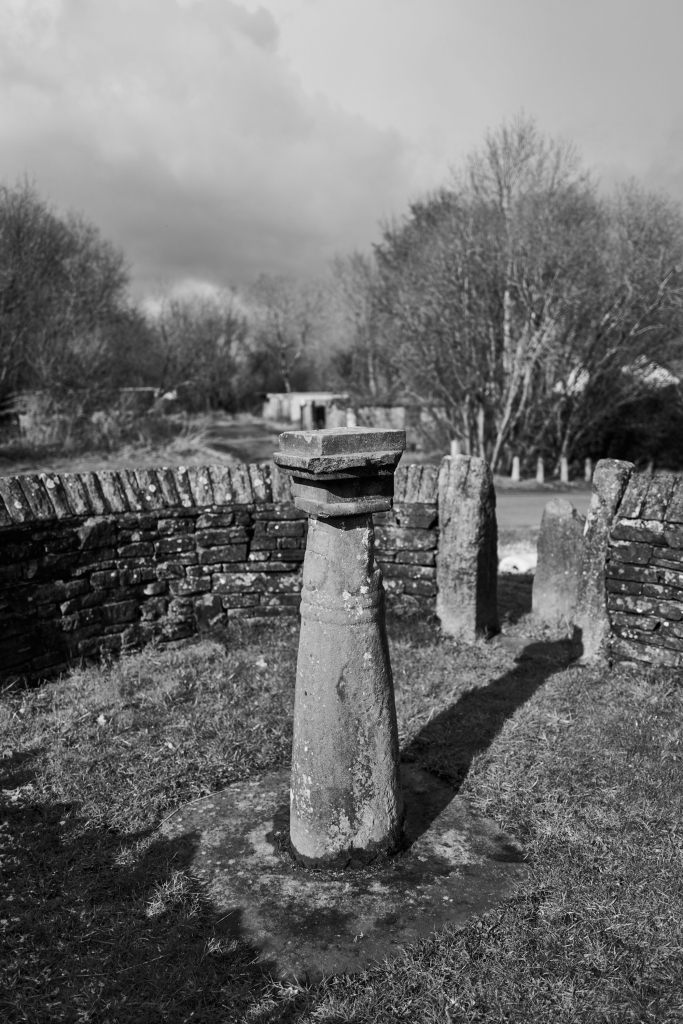
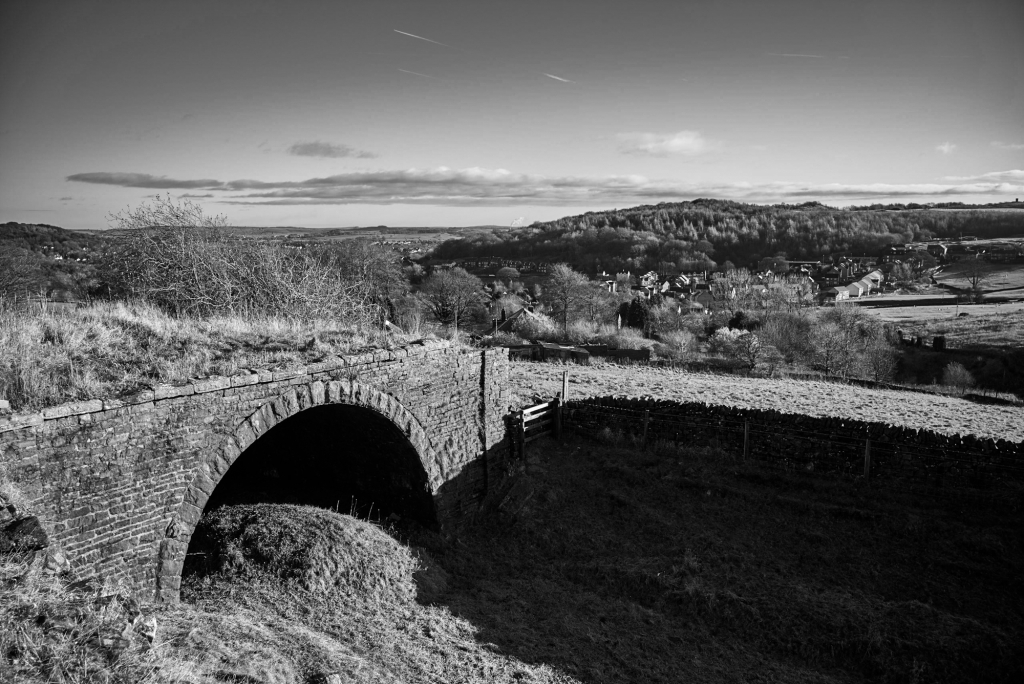
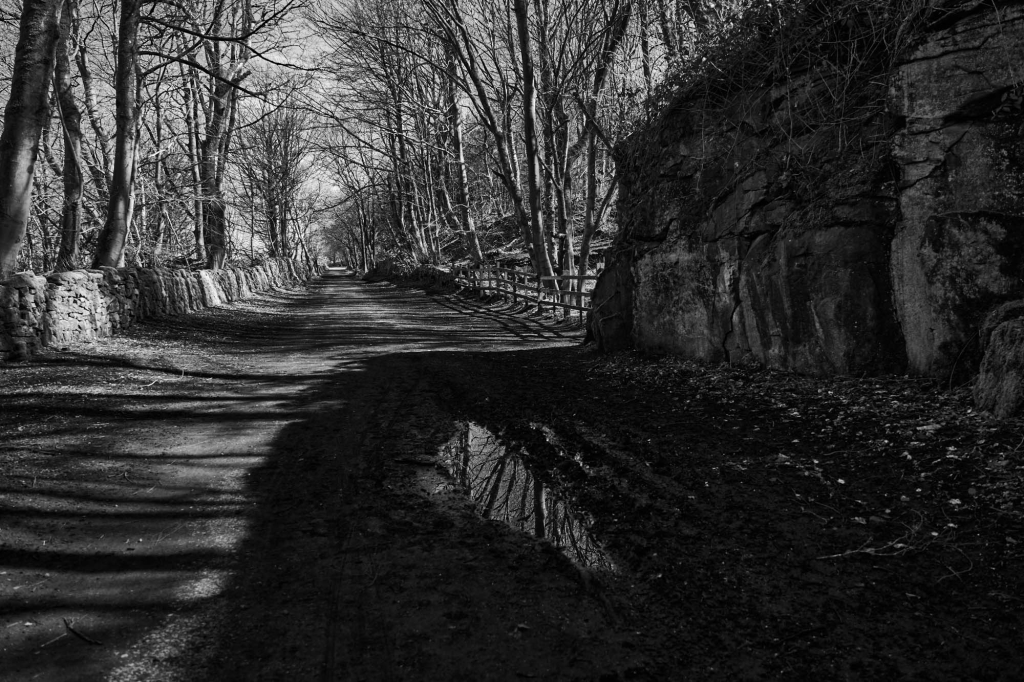
Looking up the Whaley Bridge Incline, which closed in 1952. The track turns to the right at the top where it levels out, and the site of the horse-worked capstan is obvious at the bend. The track then crosses Old Road.


Junction of Old Road and C&HPR, Whaley Bridge.

The railway line to Buxton crossed the C&HPR beyond Old Road. The bridge was very low, so that wagons for the basin had to be worked by horse from the Shallcross Yard on the west of the Buxton line. This is now blocked, so the route detours down to the A6, under the railway bridge, then back to the trackbed after the Cock Inn.

C&HPR trackbed, looking towards Shallcross Yard, Whaley Bridge.

Tunnel beneath the Chapel-en-le-Frith road, Whaley Bridge.

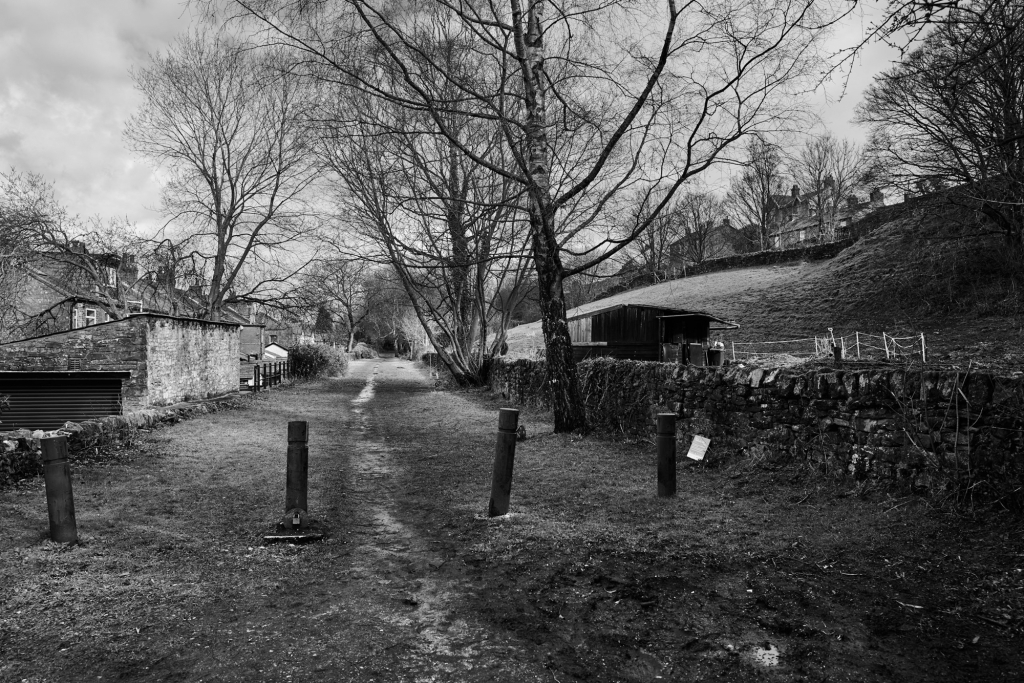
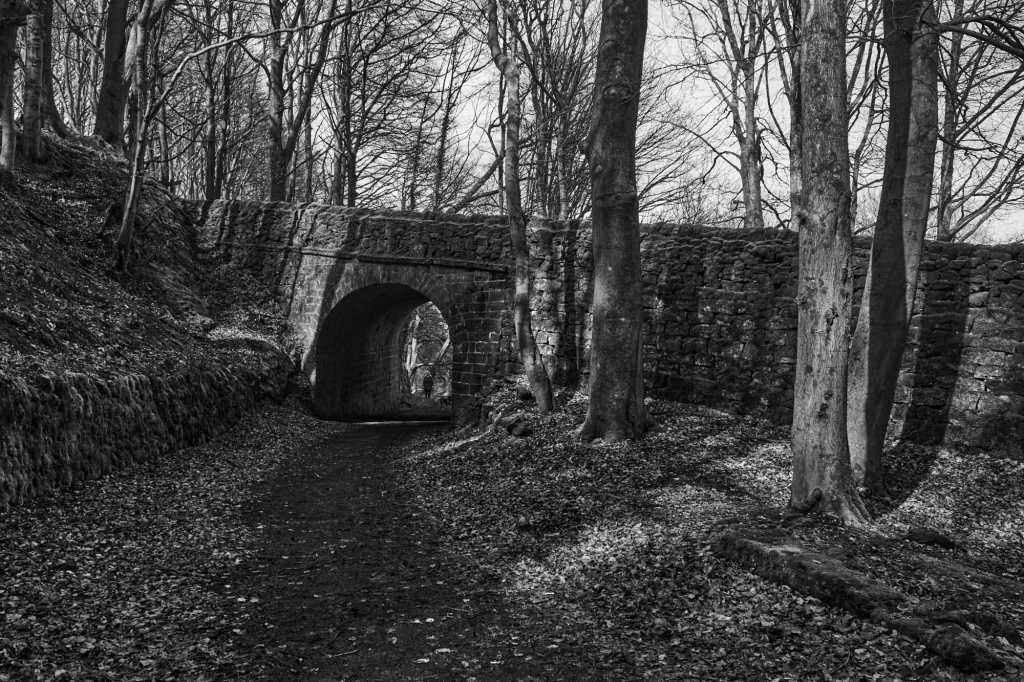
It is then a pleasant walk through the tunnel under the Chapel-Whaley Bridge road to the foot of the Shallcross Incline off Shallcross Mill Road. The incline can be walked almost the the summit – the final section is covered by housing, and a slight detour leads to Shallcross Road.

Looking down the Shallcross Incline, Whaley Bridge.

The trackbed from here to the Fernilee Reservoir dam is on private land. A short distance up the road, at the junction of Elnor Lane and Old Road, the remains of Shallcross can be seen in a small enclosure.

Remains of Shallcross, Whaey Bridge.

To get to the trackbed by the Fernilee Reservoir dam, go along Elnor Lane with the trackbed clearly visible on the right. It is crossed several times by public footpaths. Elnor Lane joins the Buxton to Whaley Bridge turnpike, and a few hundred meters further on a private road descends to car parks at the dam. The trackbed comes in from the right at the bottom of the hill, and looks as if it could be walked from the public footpath at SK 0172 7855.

Errwood Reservoir – the course of the Cromford and High Peak Railway

Shallcross Incline to Burbage

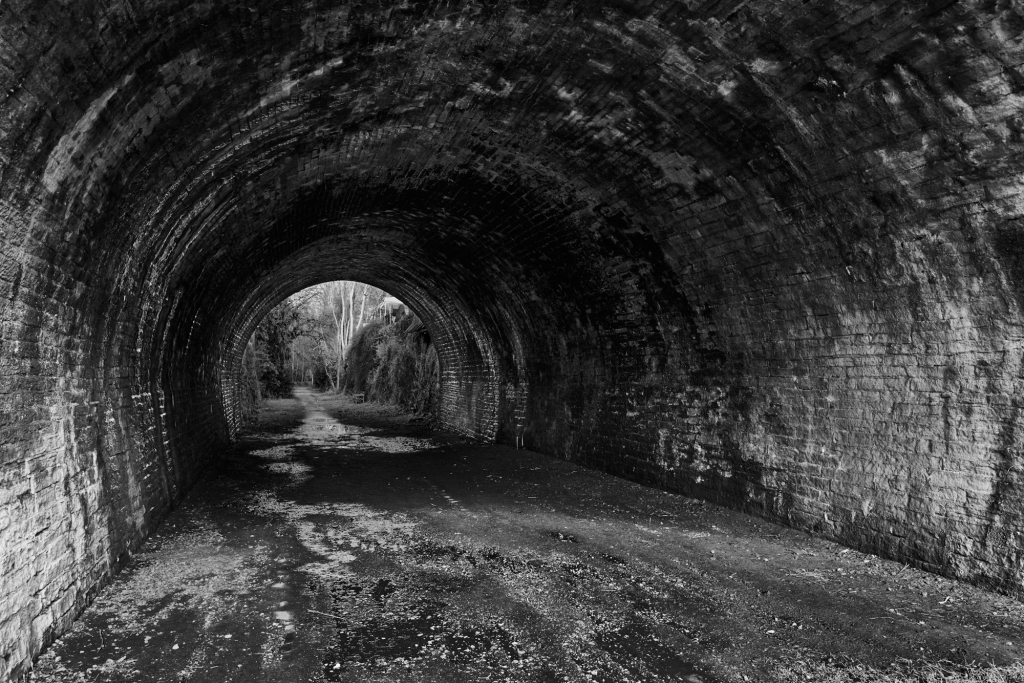
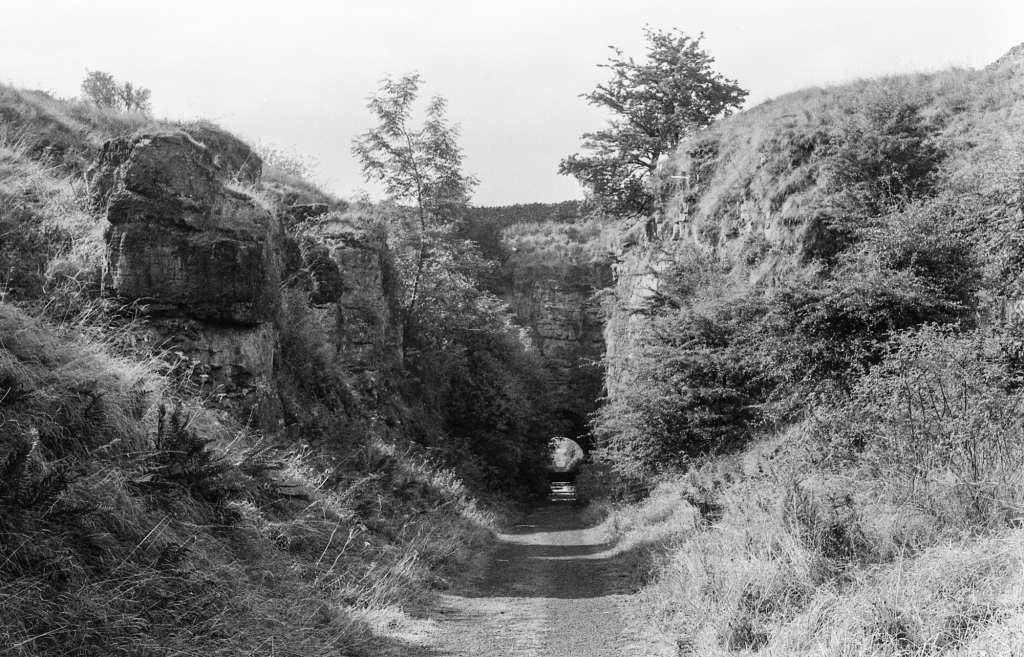
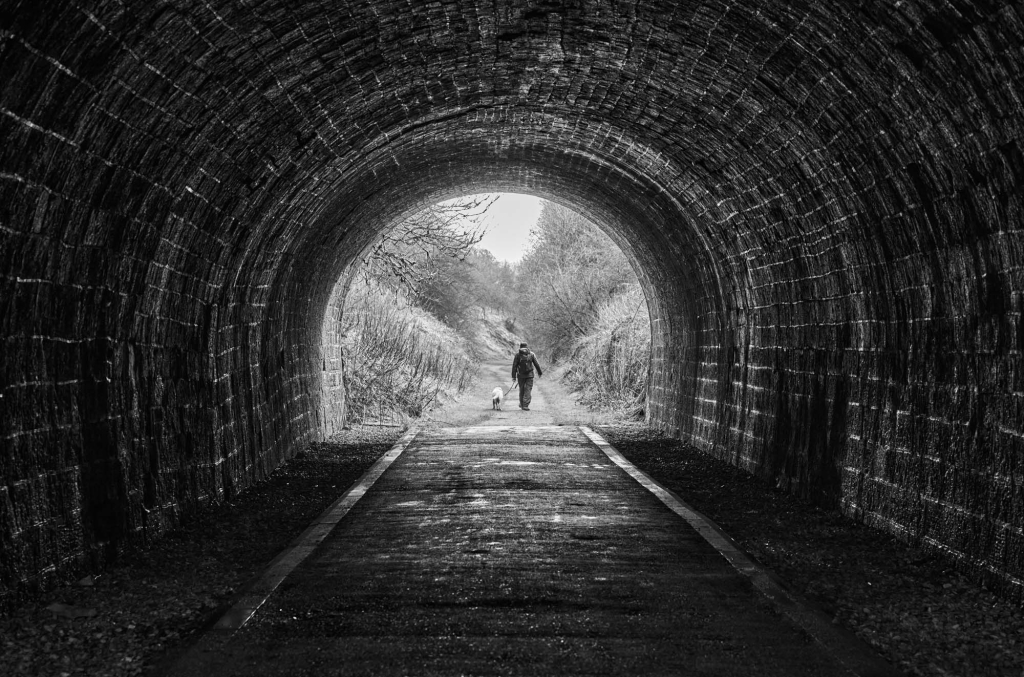
The track continues to the end of Fernilee Reservoir at the foot of the Burnsal incline, which is now a paved road. It continues past the reservoir at the top of the incline, continuing round to the Burbage Tunnel, which is sealed.

The trackbed from the reservoir at the top of Bunsall Incline, leading to Burbage Tunnel.

The mouth of Burbage Tunnel.

There are two routes to the other end of the tunnel. A public footpath to Bishop’s Lane and Burbage crosses the track just before the tunnel. At Plex Lodge, follow the lane to Plex Farm and then the public footpath across the fields to Macclesfield Old Road, a couple of hundred meters below the trackbed. It is possible to continue past Plex Farm to the railway at Edgemoor Farm, and walk along the track to Macclesfield Old Road. This is not a public footpath, but a formal proposal has been made to add it to the Definitive Map. An alternative, with more interesting views, is to go up the steep and boggy footpath to the right of the tunnel mouth, and follow the wall along the top of Burbage Edge. At SK 0306 7271 the public footpath from the Goyt Valley to Burbage is joined at a stile, and followed down to Macclesfield Old road just above the trackbed.

Burbage to Ladmanlow

The tunnel under the old turnpike is buried on the north side, but accessible on the south side from a public footpath which starts a bit higher up Macclesfield Old Road.

The trackbed from Burbage Tunnel to the blocked tunnel under Macclesfield Old Road

The Blocked tunnel under Macclesfield Old Road

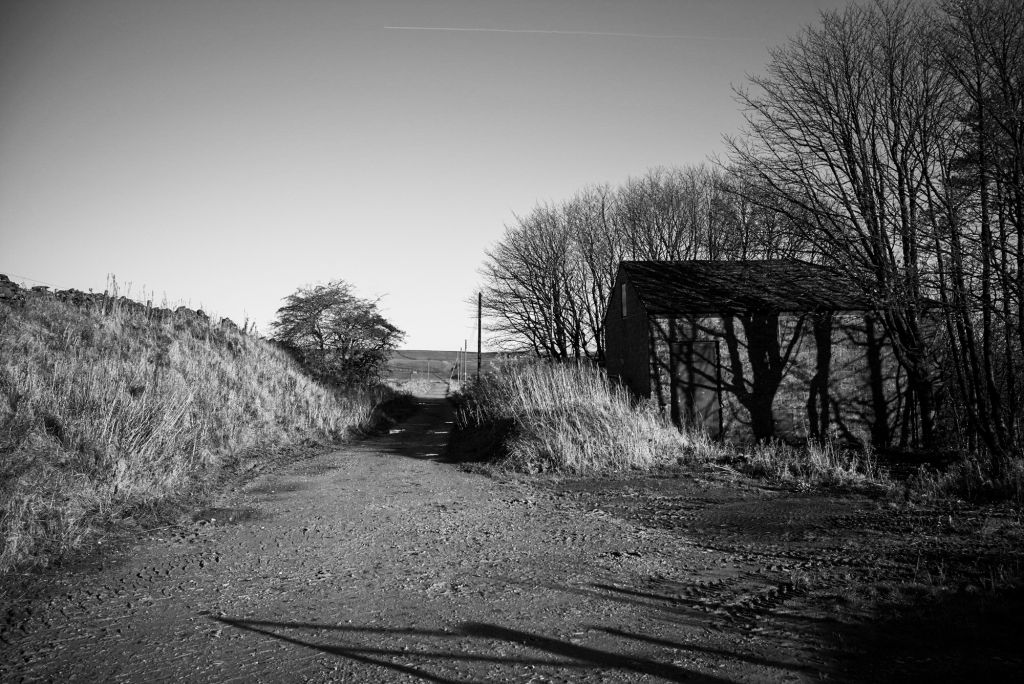
The trackbed can be seen curving across a huge embankment towards the site of the bridge across the current Macclesfield Road, beyond which is Bridgehouse Farm and the former Ladmanlow Yard. A level shelf can be seen running from the embankment beneath the Macclesfield Road, starting at about SK 0362 7225. This was a siding for the Buxton Coal Mine. This area is riddled with small coal mines.

Macclesfield Old Road on the left, with the blocked tunnel mouth just visible

None of this is accessible. The railway crossed the Leek road at Ladmanlow, SK 0415 7185. The triangular area to the north of the road was the Ladmanlow Yard, and the straight track to the north east, which can be seen on the map, served lime kilns. The quarry is now a caravan park. After the Midland Railway line was opened, the C&HPR track from Hindlow to Ladmanlow was retained to serve the lime kilns.

Ladmanlow to Dowlow

To the south, the track across Stanley Moor is a surfaced road, but this is private and you could well be stopped by security guards from Harpur Hill, which is an industrial estate, and the current home of the Health and Safety Executive Laboratories. There is a public footpath starting opposite the entrance to the caravan park and Buxton Country Park which joins the trackbed at SK 0478 7033. From here, the trackbed is a public footpath on an embankment and through a cutting to SK 0607 7086. Another embankment, partly followed by a footpath, makes a big curve to the south, and there are remains of many other tracks into quarries and works. The trackbed can actually be followed, partly on public footpaths, all the way to the junction with Buxton line (which nows serves the quarries) at SK 0764 6998. Everything we have seen so far was built by the C&HPR. From here to the beginning of the High Peak Trail at SK 1105 6731 is active railway, and was built by the Midland Railway. The public footpath continues to Brierlow Bar, with an excellent bookshop and coffee bar, at SK 16900 81281.

The quietest route to the beginning of the next section is to follow the B5053 up the hill to the turning to Earl Sterndale, go through Earl Sterndale and turn left to Wheeldon Trees where you take a lane up left towards Hurdlow Grange. Over the brow of the hill is the bridle way leading north to the trackbed.

Dowlow to Parsley Hay

This section, to the junction just south of Parsley Hay, was rebuilt by the Midland Railway as part of their Buxton to Ashbourne line. There are two places were the original line can be seen. The first is the Hurdlow Incline.

The abandoned trackbed leading to the Hurdlow incline

The deviation to avoid the incline was opened in 1869. All the original track is on private land, but the course is quite clear on the map and can be seen from the lane between Wheeldon Trees and Sparklow. The track crosses the lane at SK 1146 6683. There is a large embankment south of the lane with a sharp curve to pass behind Hurdlow Grange. The incline crosses the fields to the east of Cronkston Low – the boundary walls can be seen from the lane. Further south, by Cotesfield Farm, the deviation cuts out two very sharp curves. The original route is on private land, but the boundary walls are obvious.

Parsley Hay to Middleton Top

Parsley Hay has a large car park and a cycle hire centre in the old station yard. Just south of the station was the junction between the new Midland Railway line and the C&HPR, and from there to Cromford Wharf we are following the original C&HPR route.

The tunnel under the Buxton to Newhaven turnpike. (1970-73)

The north portal of the tunnel beneath Newhaven turnpike, showing the Coat of Arms and the engineer’s name – Josias Jessop.

The tunnel beneath the Newhaven turnpike.

The south portal of the tunnel beneath the Newhaven turnpike, showing the date that the enabling Act of Parliament was passed – shortly after the opening of the Stockton and Darlington Railway.

Embankment near Gotham

Minninglow embankment, Cromford & High Peak Railway.

Harborough Rocks.

Middleton Top

Middleton Top Engine House 1970-73.

Middleton Top to Cromford Wharf

Cromford and High Peak Railway at Black Rocks

Black Rocks

The trackbed between Middleton and Sheep Pasture inclines.

Sheep Pasture enginehouse from the top of the Sheep Pasture incline.

Intake Lane bridge beneath the Sheep Pasture incline.

Sheep Pasture incline.

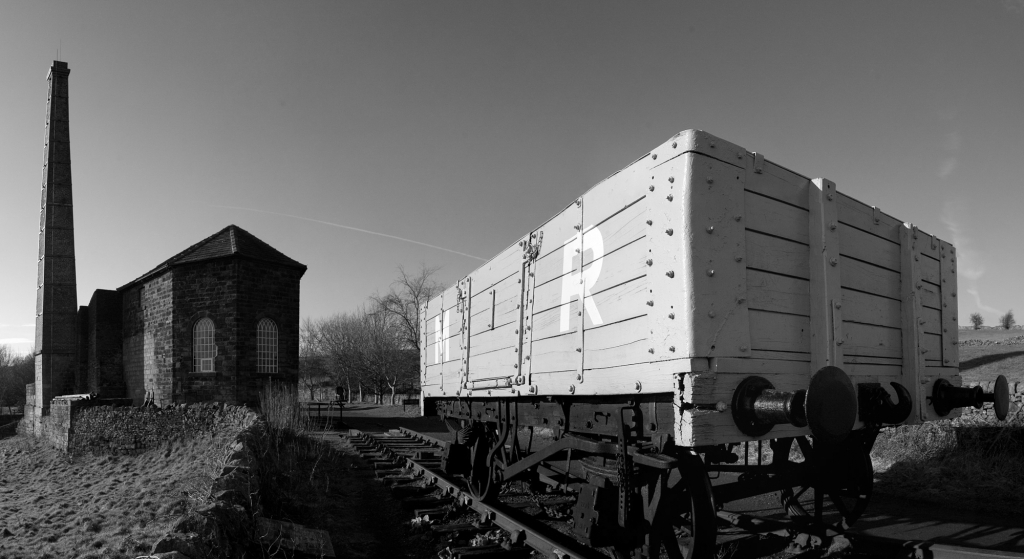
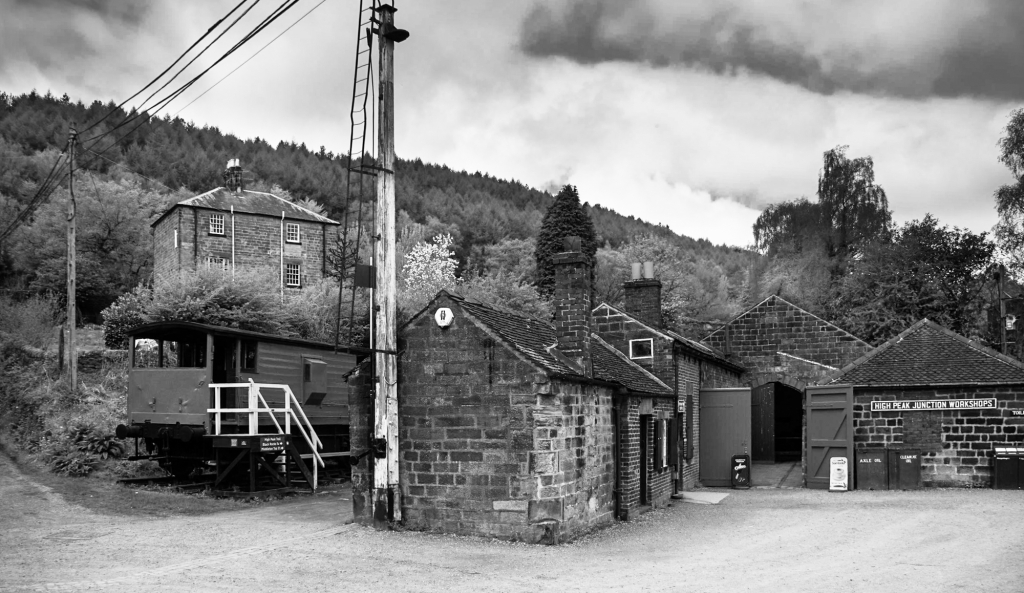
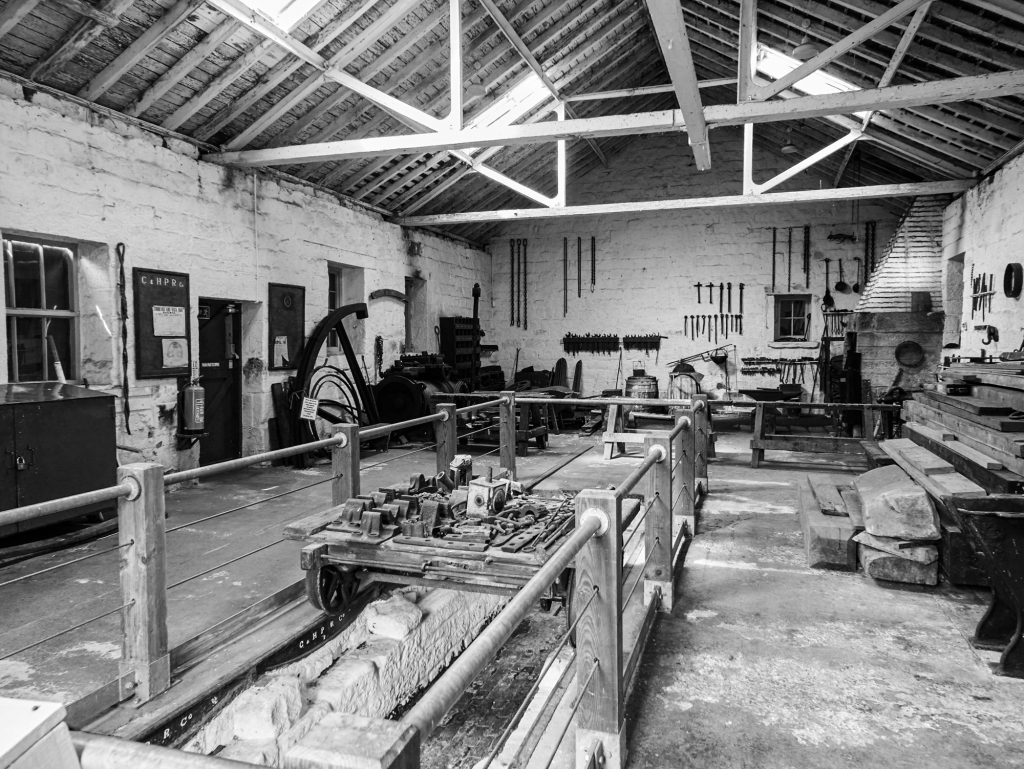
The yard at High Peak Junction on the Cromford Canal

A6 bridge over the Sheep Pasture Incline and the catch pit. 1970-73.

High Peak Junction workshops.

High Peak Junction workshop.


The transfer warehouse on the Cromford Canal.

The Connection the Main Line
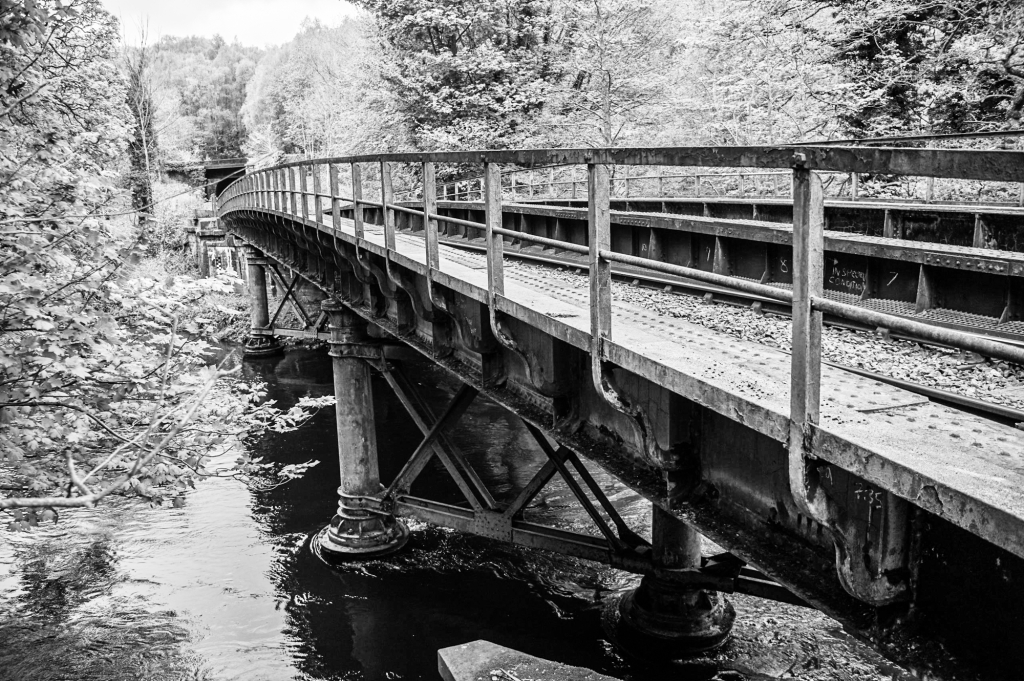
The extension to the junction with the Midland Railway.

Cromford and High Peak Railway – High Peak Junction with the Midland line. The bridge (Midland line) across the Derwent.

Cromford and High Peak Railway – High Peak Junction with the Midland line. The site of the junction.

Image Gallery

Click on any thumbnail to load higher resolution image.

Further reading

A Rimmer. The Cromford & High Peak Railway. The Oakwood Press 1985. ISBN 0 85361 319 2
John Marshall. The Cromford & High Peak Railway. Martin Bairstow 1996. ISBN 1 871944 14 7
A F Roberts and J T Leach. The Coal Mines of Buxton. Scarthin Books 2008. ISBN 978 0 90775 810 5
Colin E Mountford. Rope & Chain Haulage. Industrial Railway Society 2013. ISBN 1 901566 84 1

The Burbage Valley

There is a big gap in the edges between Froggatt and Burbage. In a straight line, it is about 3 km from the road crossing north of Froggatt to Burbage Bridge near the Fox House Inn. The tiny Tegness Quarry, Tegness Pinnacle, and Yarncliffe Quarry are the only exposed bits of rock. The Green Drive runs up the Burbage Valley to Upper Burbage Bridge, with the south and north Burbage Edges to the east and Carl Wark and Higger Tor to the west. Further to the west, above Hathersage, are Lawrencefield (Bolehill Quarry) and Millstone Edge. Most of the edges have been quarried to some extent, though they have now weathered so that it is difficult to tell natural and quarried rock apart. Millstone and Lawrencefield are quite obviously quarries, so I have dealt with them separately.

The Leaning Block on Higger Tor and the left hand wall give very steep and hard climbing, as do the quarries at the south end of Burbage. There are easier short climbs on both Carl Wark and Higger Tor on the sides overlooking the Burbage Brook. The Burbage Edges have very pleasant climbs, which can be remarkably warm and sheltered in the winter.


The path north of Froggatt Edge crosses the road below the Grouse Inn, and then goes through Hays Wood towards Nether Padley and the Longshaw Estate (NT). Hidden away in the wood is Tegness quarry and its Pinnacle.

Tegness Pinnacle.

Tegness North Quarry is just beyond the Pinnacle. This is looking north, with Hathersage in the sunshine just above the quarry. Win Hill is to the left of Hathersage, and Bamford Edge to the right.

From Tegness, it is a pleasant walk through the Longshaw Estate, across the road to the icecream van and Lawrencefield, and up Burbage Brook to Burbage Bridge on the Green Drive. From Burbage Bridge it is an easy walk across Carl Wark and on to Higger Tor. The view is looking east to Carl Wark and the South Burbage quarries from Higger Tor.

The Burbage Quarries from Higger Tor.

South Burbage Quarries.

Further west, the path from the Surprise View car park leads past Mother Cap and Over Owler Tor to a splendid view of Higger Tor, North Burbage, Carl Wark, and South Burbage from Winyards Nick.

A bit further on is the sheepfold on Hathersage Moor and Higger Tor.

Higger Tor from Hathersage Moor. The Leaning Block and the left hand wall are in the centre, and look innocuous from here.

From the east side, the enormous overhang of Higger Tor becomes obvious.

The Leaning Block of Higger Tor from the west side, with the left hand wall in the foreground. The apparently easy left hand wall still overhangs considerably.

Higger Tor does not look like a tor, but does have this obvious tor on the south end. Mam Tor is at the end of the Hope Valley.

The Leaning Block on Higger Tor, with Mam Tor at the head of the valley.

The back of Higger Tor, looking south.

We are now above the crags on the east side of the valley, reached by a path off the Green Drive. Carl Wark is in front of Higger Tor, with the Leaning Block conspicuous above Carl Wark.

Carl Wark and Higger Tor from south Burbage.

Carl Wark and Higger Tor from South Burbage.

Carl Wark and Higger Tor from south Burbage, with Mam Tor at the head of the Hope Valley.

Carl Wark and Higger Tor from south Burbage.

There is a footpath which runs from Mitchell Field, past the sheepfold and Carl Wark, across the Burbage Brook and the Green Drive. It then passes between North and South Burbage to the Houndkirk Road which runs from the Fox House Inn to Ringinglow. This view of North Burbage is taken from the Green Drive just north of where the path crosses.

North Burbage from the Green Drive.

North Burbage from the road at Fiddler’s Elbow. There is a beautiful oak wood below the edge.

North Burbage with Stanage on the horizon, from the gap between the north and south edges.

Burbage North – the south end.

Burbage North.

Starting young. North Burbage.

North Burbage Edge and Stanage.

Burbage North – the Chant area and Triangle Buttress. These are the last buttresses before Upper Burbage Bridge.

Image Gallery

Click on a thumbnail to open a higher resolution image.

Peak District Snow

When we first moved to the Peak District in 1970, we reckoned on about three days per week between Christmas and Easter when we would have difficulty getting to work in Sheffield because of the snow. Those days are long gone. Apart from a freak week in 2013, the last serious snow was in 1986. It was possible to ski off the top of Stanage in places, and Flying Buttress was half buried. Kinder Downfall had vanished under an icefall and was attracting lots of ice climbers.

Stanage, near Robin Hood’s Cave.

Jill and Tess on Stanage.

Flying Buttress, Stanage.

Half-buried Flying Buttress on Stanage.

Stanage Popular End.

Inverted V, Stanage.

Approaching Kinder Downfall.

Kinder Downfall.

Kinder Downfall.

Kinder River at the Downfall.

Image Gallery

Click on a thumbnail to open a higher resolution image.

Baslow, Curbar and Froggatt Edges

Baslow, Curbar and Froggatt edges are almost continuous for about 4 km. Baslow and Curbar are separated by the road through Curbar Gap, and there is a break and about a 40m change in level between Curbar and Froggatt. The south end of Baslow Edge can be approached up Bar Road, the old bridleway to Sheffield, near the top of which is Wellington’s Monument. There is a bridleway well behind the edge, past the Eagle Stone, to Curbar Gap. Much more interesting is to walk along the top of the edge, with good views across the valley and to Curbar Edge. Baslow Edge is fairly low, very broken up, and has an oak wood close beneath it, so following the base of the rocks varies between difficult and impossible. Curbar Edge is imposing, particularly the Eliminates Wall, with splendid views across the valley. Walking along the base of the rocks is possible, but much more difficult than along the top. At the north end, before the drop down to Froggatt Edge, there is a great panorama round from Win Hill to Bamford Edge, Stanage, Burbage, Higger Tor and Carl Wark – a great place for understanding the layout of the eastern edges. Froggatt Edge is more continuous, with many classic climbs. After the Pinnacle the path keeps back from the edge until the road is reached below the Grouse Inn, with the Longshaw Estate across the road.

Wellington’s Monument, Baslow Edge

The bridleway behind Baslow Edge. Curbar Edge on the skyline with White Edge at the far right.

The Eagle Stone on Baslow Edge.

Curbar Edge from Baslow Edge, with a temperature inversion in the valley.

The Eliminates Wall, Curbar Edge.

Curbar Edge.

Curbar and Calver from Curbar Edge.

Curbar Edge. A pinnacle below the main edge with Stoney Middleton Dale in the distance.

Curbar Edge. A pinnacle below the main edge with Baslow Edge behind. The Emperor Fountain at Chatsworth (Grade II listed) can be seen to the right.

Looking over Curbar Village from Curbar Edge, with a temperature inversion in the valley.

The view west from Curbar Edge with a temperature inversion in the valley.

Stoney Middleton Dale from Curbar Edge.

Baslow Edge from the south end of Curbar Edge.

The pinnacle on Curbar Edge, with Baslow Edge behind.

Baslow Edge from the south end of Curbar Edge on a dismal late afternoon in November.

The north end of Curbar Edge.

Froggatt Edge from the corner of New Road between Grindleford and Eyam. Froggatt Pinnacle is in the centre.

A panoramic view at the north end of Curbar Edge. The Froggatt Pinnacle is right centre below Win Hill, with Bamford Edge in the sun on the right.

Froggatt Pinnacle. A climber can be seen on Brown’s eliminate (E2 5c). On the skyline to the left is Win Hill, and to the right is Bamford Edge.

Millstones below Froggatt Edge.

Chequers Buttress, Froggatt Edge.

Froggatt Pinnacle.

The cave on Froggatt Edge – I spent a night here in about 1967 on a climbing trip from Lancaster.

Froggatt Edge near the Pinnacle.

Image Gallery

Click on any thumbnail to open a higher resolution image.

Birchen Edge and Gardom’s Edge

Birchen Edge is quite close to the road and popular because it has mainly easy routes – though they may not feel quite so easy on closer acquaintance. Gardom’s Edge, lower than Birchen and further to the west, is altogether different. It is hidden in the trees, has a boulder field below it, and finding your way around is difficult. It also has a reputation for being hard – it is usually deserted.

My usual round starts from the Robin Hood car park, over Birchen Edge, across the moor to Gardom’s Edge, and back down the public footpath from Baslow Edge across the Bar Brook (the bar is Owler Bar on the Sheffield to Bakewell turnpike). Start with a short walk along the road, then either through the birch wood below Birchen Edge, or, after a couple of hundred meters, up onto the Edge with long views to the west up the Derwent Valley with the long line of edges running towards the north and Bleaklow.

The view westwards, shortly after reaching the top of Birchen Edge. The line of trees in the middle distance, beyond Moorside Farm, mark the top of Gardom’s Edge.


The pillar on Birchen Edge is a monument to Nelson, erected in 1810 (Nelson died at the Battle of Trafalgar in 1805). The column is 3 metres high.


The three tors behind the edge are engraved with the names of Nelson’s ships: Victory, Defiance and Royal Soverin (sic). There are also carved initials with the date 1766 – 39 years before Trafalgar.


Nelson’s column from the north. The Three Ships are out of sight to the left.


Birchen Edge to the north of the column. From here, it is a very short walk to the trig point and a path down onto the moor and across to Gardom’s Edge.


It is about 700-800 metres across the moor through scattered birch trees to the boundary wall above Gardom’s Edge. There are fine views back to Birchen Edge – in the image below, Nelson’s column is just left of centre. The OS map shows a path to the middle section of Gardom’s, but the more obvious route on the ground follows the wall to the south end.


The Cup and Ring Boulder is in the birch wood above the edge at the south. This is actually a glass-fibre replica – the original has been buried to protect it. Neolithic or Early Bronze Age.


The alternative route to Gardom’s Edge is from the cross roads by the confluence of Bar Brook and Blake Brook to the north of the edge. The two roads are the Sheffield – Bakewell turnpike and the Curbar – Chesterfield turnpike. The images follow the edge from north to south.

Overhang Buttress.


Following the bottom of the crag is not easy – this is the Black Wall area.


The Nowanda buttress.


Hearse Arête.


Three views of the top of the edge between Hearse Arête and Undertaker’s Buttress.


Undertaker’s Buttress.


Gardom’s Unconquerable – there are lot of routes called ‘Unconquerable’ – all of which have been climbed.


Three views of Apple Buttress, which is relatively open, unlike most of Gardom’s.


Moorside Rocks to the south of Gardom’s Edge.


Gardom’s Edge overlooks the Sheffield – Bakewell turnpike as it runs down the valley of the Bar Brook. This is the view back to Gardom’s from Bar Road – the original turnpike, now a bridleway – just below the south end of Baslow Edge. The trees along the left skyline are on the top of the edge. On the far left a buttress (Apple Buttress I think) is lit up by the sun.


Image Gallery

Click on any thumbnail to open a higher resolution image.

Peak District Gritstone

Carl Wark and Higger Tor.

The Peak District consists of a central limestone plateau with a number of deep river valleys, and a surround of shales and sandstones. The sandstones – gritstone in the local terminology – form elongated crags and tors, often no more than about 20m high. These run up the eastern side of the Derwent Valley from Chatsworth to the upper reaches of the Derwent beyond Howden Reservoir. Kinder Scout is surrounded by high and remote outcrops just below the plateau, including Kinder Downfall which provides ice climbing in a good winter. There are fewer and more scattered western edges, which finish north of Leek at the magificent tiers of the Roaches. There is more climbing further north – Laddow north of Longdendale and the Dovestones Quarries – but I have few photographs of these areas.

The depths of the sandstone series vary from 300m in the east to more than a 1000m in the west, with many different depositional layers. These vary from very fine grained rock with sharp edges, kind to hands, to extremely rough and rounded rock which is very abrasive but provides magnificent friction.

Eventually, this will be a tour around the gritstone edges: Birchen and Gardom’s; Baslow, Curbar and Froggat; the Burbage valley including Carl Wark and Higgar Tor; Stanage and Carhead Rocks; Derwent Edge and the Wheelstones; Kinder Downfall and other crags; Castle Naze and Windgather; and the Roaches, Hen Cloud and Ramshaw Rocks.

Peak District Snow
Birchen Edge and Gardom’s Edge
Baslow, Curbar and Froggatt Edges
The Burbage Valley
Stanage and Carhead Rocks


Further Reading

Roger Dalton, Howard Fox and Peter Jones. Classic Landforms of the Dark Peak. The Geographical Association 1999. ISBN 1-899085-61-0.

Tony Waltham. The Peak District. Landscape and Geology. The Crowood Press 2021. ISBN 978-1-78500-874-0

Stanage and Carhead Rocks

I have run, walked, and climbed at Stanage for more than 50 years. I have even skied off the top of the crag in memorably snowy winters. From my house, Bamford Edge and Stanage form the distant eastern skyline. It is, by far, my favourite place in the Peak District. The edge is 6-7 km long, about 20m high at its highest, and set so well back from the valley that you hear no road noise. It runs roughly north-south, with the ‘Popular End’ at the south, and the much quieter High Neb and North End beyond the Long Causeway – the Roman road from Sheffield to Brough and Buxton. Carhead Rocks is a much smaller outcrop – an edge in miniature – below the Popular End, overlooking Hathersage.

The End Slab at the north end of Stanage. Kinder and Bleaklow spread across the horizon, with the top of Win Hill visible in between.


The Wobbler area at the north end of Stanage.


The Apparent North buttress at the south end of Stanage, with almost-finished grindstones. There are two trig points on Stanage, one towards the north on High Neb, and one on this buttress.


Stanage Plantation and the Popular End from the path up to Carhead Rocks.


Carhead Rocks, looking south.


The Hope Valley from Carhead Rocks. The cement works is obvious, with Mam Tor sunlit to the right. Lose Hill is above the foreground boulder, with Win Hill to its right. The dark horizon on the far right is the back of Bamford Edge.


Derwent Edge (the distant dark skyline on the left) and Stanage from Carhead Rocks. The Plantation is on the right. The Long Causeway runs down from the lowest point past the trees on the left. The highest point, middle left, is High Neb (Neb = nose).


Carhead Rocks – an edge in miniature.


Imposing – but actually small – buttresses on Carhead Rocks.


Basin 24 with #23 in the background. There are nearly a hundred of these basins to provide drinking water for the grouse. They are in a big arc along the north edge of Stanage round to the Rivelin Reservoirs.


Marble Wall at the north end of Stanage. The climbers are on First Sister (VS 4c).


High Neb, which is north of the Long Causeway. The climber is on High Neb Edge (HVS 5c).


The view south from the vicinity of High Neb. The Long Causeway, descending from Stanedge Pole, is clearly visible.


Almost all of the 6-7 km of Stanage is visible from the south end, curving away to the right of the image. Bleaklow is the righthand skyline with Kinder Scout on the left. Mam Tor and Rushup Edge are on the far left of the picture with Win Hill left of centre.


The Hope Valley from the Popular End of Stanage, with Mam Tor in the centre of the skyline.


The Popular End of Stanage, looking north.


The top of Flying Buttress, with Mam Tor, Lose Hill, Win Hill and Kinder on the skyline.


A typical Stanage buttress. There are three of the Top 50 routes in the Rockfax guide to Eastern Grit on this buttress – out of some thousands in the guide. The shadowed corner on the left is the superb Inverted V (VS 4b) – climb the crack and exit under the overhang on either side. Next to this is Robin Hood’s Right-hand Buttress Direct (HS 4a) – not difficult, but definitely intimidating. On the right-hand corner, up the crack above the tree, is Bishop’s Route (S 4a).


Stanage Plantation and High Neb on a stormy December day.


Lose Hill, Win Hill, the back of Bamford Edge, and Stanage from Carhead Rocks.


The very-well worn paved path, a packhorse route, through the Plantation and up to the Long Causeway.


High Neb from the paved path.


Looking south to the Plantation from the paved path.


The top of the paved path.


Boulders and tors between the top of the paved path and the Long Causeway.


The Popular End from above the Plantation.


Robin Hood’s Cave.


The Popular End.


Belaying on the top of Flying Buttress.


Win Hill, Kinder and Bleaklow from the Flying Buttress area.


The southern end of the continuous crags at Stanage.


Image Gallery

Click on any thumbnail to open a higher resolution image.

Hope Cement Works: large-scale landscaping

Rod Smallwood: Nether Moor Images

I was recently skimmimg through a book on 20th century gardens and landscapes, and came across a reference to Hope Cement Works. We have lived near this for fifty years, so I was immediately interested. The cement works is the largest in the country, producing 1.5 million tons of cement a year, and is in the middle of the Peak District National Park.

In 1943, four years before the designation of the Park, Gordon Jellicoe was asked to produce a fifty-year plan for the landscaping of the works – his first major commission. He produced a model of what the quarry and its surroundings would look like by 1993 if his proposals were followed. His main recommendations were that the quarry should have a narrow entrance, and not break the skyline, so as to minimise its visibility; waste tipping should, as far as possible, be within the quarry, and otherwise should follow the natural contours of the valley slopes; the clay extraction ponds should be landscaped as recreational lakes when extraction was completed; and that there should be extensive tree planting around the works. The quarry has grown considerably since 1993, had several owners, but still has a landscaping plan. How successful is it – on the face of it, tree planting is not going to screen a 132 m tall chimney!

In the 1970s the works was much more conspicuous. There was always a plume of smoke from the chimney, and you could smell the coal smoke when 3.6 km away on top of Win Hill. Now there is no plume and no smell.

There are two public footpaths through the works. The lower one runs from Michlow Lane in Bradwell to the corner of Pindale Road, between Hope and Castleton. It runs through a wooded area between the works and the quarry, but you cannot see the quarry. The picture above shows where the path crosses an access road to the quarry. The works is remarkably well screened.


The buildings are enormous – seen above when crossing the access road, and below through the perimeter fencing.


At a second access road you come to the 132 m chimney and associated building, which must be about 60 m high.

It is a bit of a surprise to find that there are lawns and trees around the buildings – not the usual wasteland that surrounds quarries. The picture above shows one of the rotary kilns.


The second public footpath starts on Siggate, the original road from Tideswell to Castleton, which is now diverted around the top of the quarry. An access road leads to a shelter at the edge of the quarry, where the scale of the operation becomes obvious. From the shelter, which is below the skyline, you can watch the peregrines which nest in the quarry.

The pictures above and below were taken from the same place, and show the increase in size of the quarry over a ten-year period. 2.5 million tons of stone are extracted each year. To give an idea of scale, in the middle of the picture below, there is an excavator and dumper truck. The wheels on the dumper truck are the same height as a Land Rover.


The quarry and works are bound to look enormous when one is in them. More important is their impact in the landscape. From Bradwell, about 1.5 km from the chimney, the works is pretty dominant but the quarry cannot be seen – the conveyor buildings can be seen going up the hillside on the left. Mam Tor is on the left skyline, and the Grey Ditch is in the foreground. The Grey Ditch is a defensive rampart built in the 5th and 6th centuries CE.


The next two views are taken a bit further away on Brough Lane, going up from Brough and over to Abney. In both views, the crusher building and store at the mouth of the quarry can be seen.


We are now on Bradwell Edge, about 2.5 km from the chimney, which is off the right edge of the image. The top tiers of the quarry can be seen, but most of it is not visible. The crusher is just off the right edge of the image, which gives an idea of the size of the quarry – it is approaching 2 km long. The upper part of Bradwell is in the foreground. Batham Gate, the Roman road to Buxton from the fort at Brough, can be seen running from the houses on the right edge of the image diagonally across the centre to the solitary barn which is near the tree belt on the edge of the quarry.


The view from the north-west, on the side of Win Hill. Despite their size, the buildings do not dominate the landscape from here. The crusher and storage buildings can just be seen, but the quarry is hidden. The trees on the hill above the works, and on the lower ground, break up the massing of the buildings and disconnect them from the quarry.


From 5 km away, on Bamford Edge, the buildings have become part of the landscape. From here, the back of the quarry is visible. It faces north-east, so is in shadow, and is well below the skyline. The most obvious thing from here is the straight access road up the righthand side of the quarry.


About 8 km from the chimney, on the hill above Hathersage Church. The building is an exclamation mark, but in scale with the great width of the valley which is dominated by the dramatic face of Mam Tor and the skyline of Rushup Edge, Mam Tor and Kinder Scout.


Further away still, on Burbage Edge, over 10 km from the chimney, it is still a significant feature in the landscape, but Carl Wark and Higger Tor in the foreground, and Mam Tor, can easily compete for attention. The storage building can just be seen, and the quarry is difficult to pick out.


From Stanage Edge (this is above the Plantation), about 8 km from the chimney, the buildings don’t stand out at all, but the quarry is more visible but still below the skyline.

The view is much the same from Carhead Rocks below Stanage Edge.

So, what is my verdict? I think Jellicoe’s plan has been remarkably successful. It would be impossible to disguise either buildings or quarry – they are far too big – but they do not look out of place in the landscape, unlike many of the other limestone quarries, around Buxton for instance. It is obvious in the image above that the scale of the valley and the surrounding hills is sufficiently large to contain the buildings and the quarry. The chimney and its associated tower actually give scale to the valley. I think an eighteenth century traveller would have said it was Sublime, and Chantrey would have painted it!


Further reading

The book which started this is ‘100 20th-Century Gardens & Landscapes’, edited Susannah Charlton and Elain Harwood.

I have been unable to find a copy of Jellicoe’s original report, but it was reviewed in the Architectural Review. The review is online at Jellicoe at Hope Works. It has photos of Jellicoe’s model, but no plans, because it was wartime and publishing maps was forbidden.


Click on a thumbnail to open a higher resolution image.

Writing on Stone

Graves, guide stoops and graffiti in the Peak District

Rod Smallwood: Nether Moor Images

Stone is everywhere in the Peak District, and carving on stone is universal. Some is obviously legitimate – boundary markers, guide stoops, gravestones. But where do graffiti fit – vandalism or art? I get annoyed when I see people scratching their names on rocks, and tell them off. On the other hand, I love beautifully carved script. I have stopped trying to reconcile the two responses.

Rainster Rocks. Beautiful script from 1691 on a little-visited dolomitic limestone outcrop.

Monument to Nelson on Birchen Edge, erected in 1810 to commemorate the Battle of Trafalgar (1805).

‘Victory’, ‘Royal Soverin’ and ‘Defiance’ on Birchen Edge.

‘Victory’, ‘Royal Soverin’ and ‘Defiance’ on Birchen Edge.

Guide stoop on Longshaw Estate in the Peak District. The right-hand face says ‘To Shafild 1709’. If you are facing the name of the town, the road to it is on your right. The spelling presumably reflects the local pronunciation of ‘Sheffield’.

Guide stoops are scattered over the East Moor on packhorse routes – this on is on the Longshaw Estate. Well-formed lettering, but again phonetic spelling of ‘Chesterfield’.

A boundary marker at the northern end of Stanage Edge.

Carved water trough 33 at Stanage End, with Win Hill and Kinder Scout on the horizon. There are 171 altogether, in three groups, at the north end of Stanage Edge. They were made to provide water for grouse.

Guidestone of 1860 near High Bradfield in the Peak District.

A guidestone on Mortimer Road with an added Ordnance Survey benchmark. Mortimer Road is a turnpike road, constructed in 1777.

The head of Grindsbrook.

Youlgrave churchyard, 1713 and 1731.

Bakewell churchyard, 1718.

High Bradfield churchyard – no visible date. The script is very fine, but the layout was not well planned!

Benchmark on Derwent Edge.

Edale Cross. There is a date on the cross (HG 1610), which Historic England think refers to a survey, and four sets of initials, presumed to be graffiti.

Ramshaw Rocks in the Peak District. There are a number of sets of initials and punch marks around here, but no apparent reason for an arrow.

Curbar Edge.

Curbar Edge.

Inscription at the base of the Great Slab, Froggatt Edge, 1622.

Cratcliff Tor has several sets of initials, and the adjacent outcrop of Robin Hood’s Stride is covered in graffiti, some old and some very large.

Beautiful script from 1977 on Stanage Edge.

Click on a thumbnail to open a higher resolution image.